Create Text on a Path – A Simple Fusion 360 Script
Background
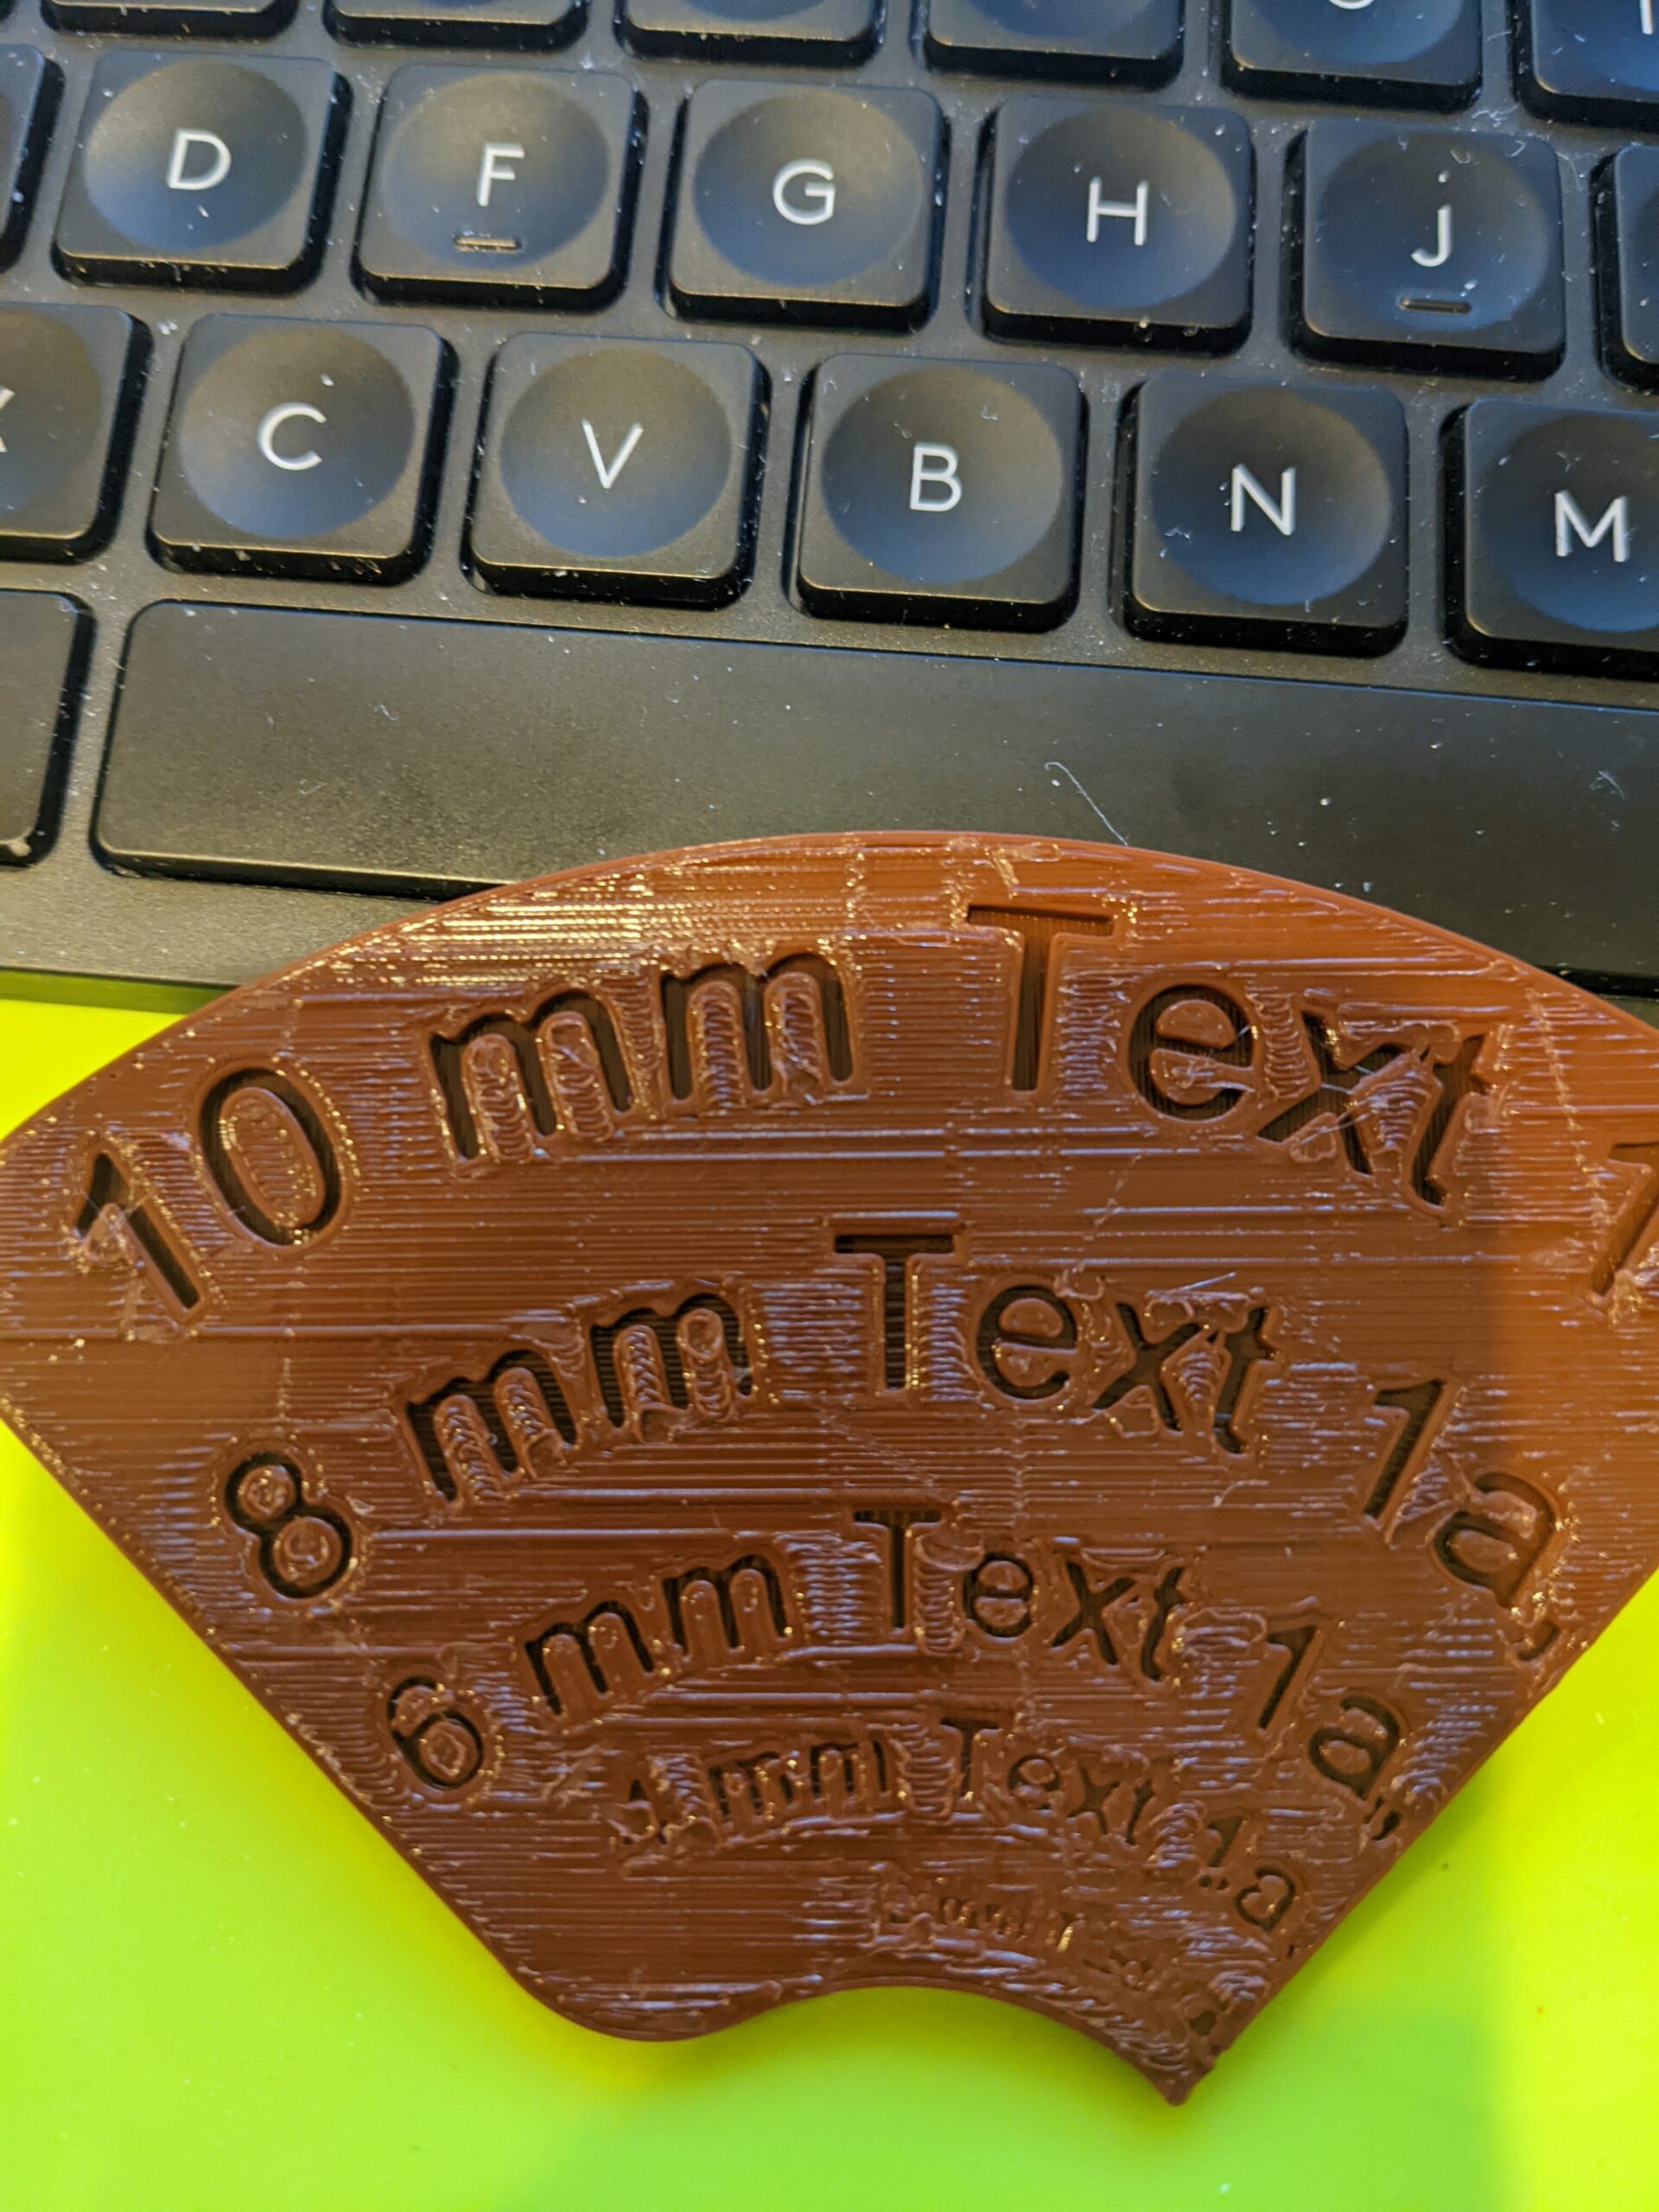
A recent discussion about the quality of engraved text for 3D printing got me thinking about the best way to test various fonts and sizes. Creating text is fairly trivial in Fusion 360, but it quickly gets painful if you want create multiple lines of text in multiple sizes with different fonts.
I whipped up a quick design by putting several lines of test text on a series of 3-point arcs. It was just 5 lines of text with varying font heights from 2 – 10 mm. I used the standard Arial font that we all have on our system. It worked fine, but I wanted an easy way to edit the sketch and change the font, the test text string, and the font heights. It is not hard, but it is very putzy (that’s a technical term!) to go back and edit each string and change the font name and height.
Enter Fusion 360 Scripting
I have been messing with writing Python scripts and add-ins for Fusion 360 for a while and decided to whip up a quick-and-dirty script to quickly create a sketch with text on multiple paths with varying font heights. By using variables for the font name, text string, and a scaling factor, I can quickly generate a new sketch with any font on my system.
If you’d like to learn what’s involved in creating the script from scratch, keep reading. It’s not hard – you’ll just have to copy and paste my code. If you are familiar with scripting and how to create and manually install a script, just download the code and use it. The script is pretty well documented.
Download the Script
Install the Script
There are two methods to get my script installed. Both are well-documented by Autodesk.
The first method is pretty straightforward if you follow the instructions provided by Autodesk. It involves extracting the “Create Test Text on a Path” folder from the ZIP file to a specific place where Fusion 360 stores scripts. The location depends on whether you’re using a PC or a Mac. The instructions for how to do this can be found in the Fusion 360 Knowledge Network so I won’t go into detail here. Follow the instructions for adding a script manually in the link below.
Autodesk Knowledgebase – How to install an add-in or script in Fusion 360
The second method involves creating a script from scratch and then copying my code and saving the script. You may want to review the process first to get a good visual overview.
Autodesk Help – Creating a Script or Add-In
Creating a Script from Scratch
Open Fusion 360 and select the Utilities tab > Add-Ins to open the Scripts and Add-Ins dialog box.
You can also use Shift + S to open the Scripts dialog no matter which tab is active.
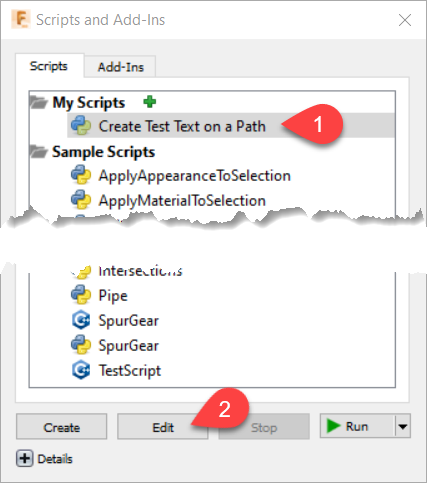
With the Scripts tab selected in the Scripts and Add-Ins dialog, click the Create button.
In the Create New Script dialog:
| Create a New: | Script |
| Programming Language | Python |
| Script or Add-In Name | Create Test Text on a Path (or something shorter if you prefer) |
| Description | Simple script to quickly create test text on a path with increasing font heights |
| Author | Ed Johnson (that’s me!) |
| Target Operating System | Windows and Mac (there’s nothing that’s specific to either OS) |
| Folder Location | leave it as the default |
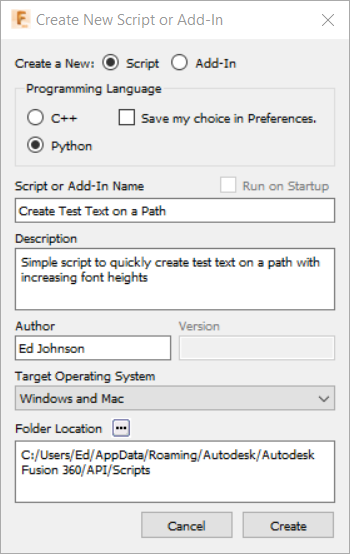
Click Create.
The script will be added under the My Scripts section.
Click the Edit button to open Visual Studio Code editor.
You should see a basic “Hello script” placeholder code.
Delete all of this code.
Expand the script code block below, and click the Copy link to copy it to your clipboard.
If you downloaded the script, you can also copy the code from the Create Test Text on a Path.txt file.
Switch back to the VS Code editor and paste in the code you just copied.
Note
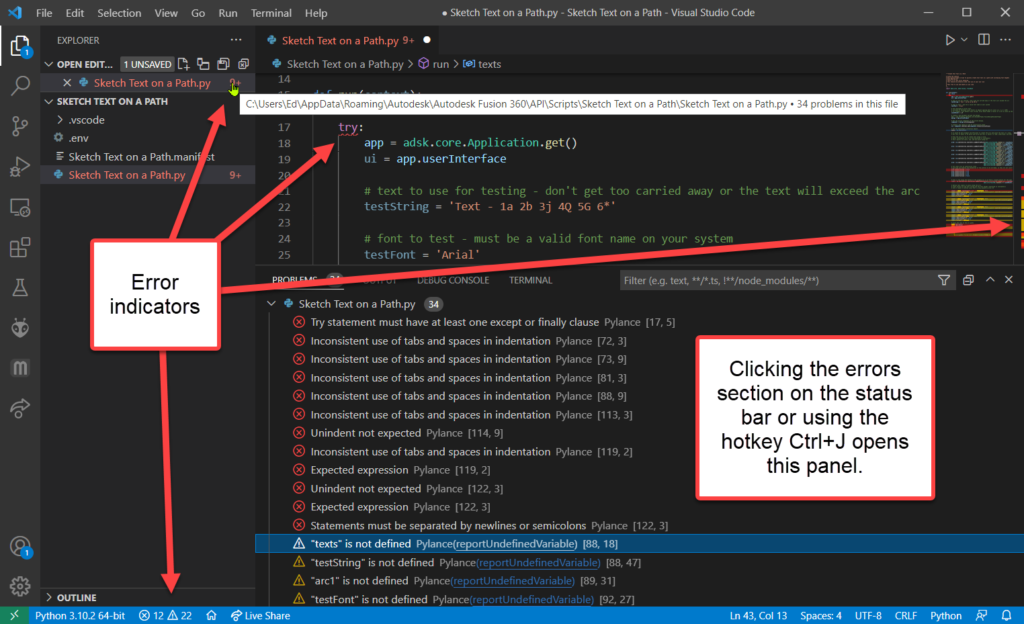
Unlike most other programming languages, Python is very picky about white space and indented code.The copied code should be formatted OK, but I have seen an issue once in a while where after pasting the code, you may see a bunch of squiggly red lines and errors and warning on the status bar along the bottom of the editor window (VS Code has error indicators all over the place!) Most of these errors are “inconsistent use of tabs and spaces”, which then create the other errors and warnings you see.
A quick way I found to reformat the code so Python is happy is to select all of the code (Ctrl+A) and hit TAB followed by Shift+TAB. This should fix all of the code indenting and clear up all of the errors.
After cleaning up any errors, save the script (File > Save or Ctrl+S). At this point you can close the VS Code editor, but I recommend leaving it open. This will allow you to make tweaks to the variables and re-run the script. There is no need to restart Fusion between edits of the script. Just remember to save your current code changes before re-running the script.
Running the Script
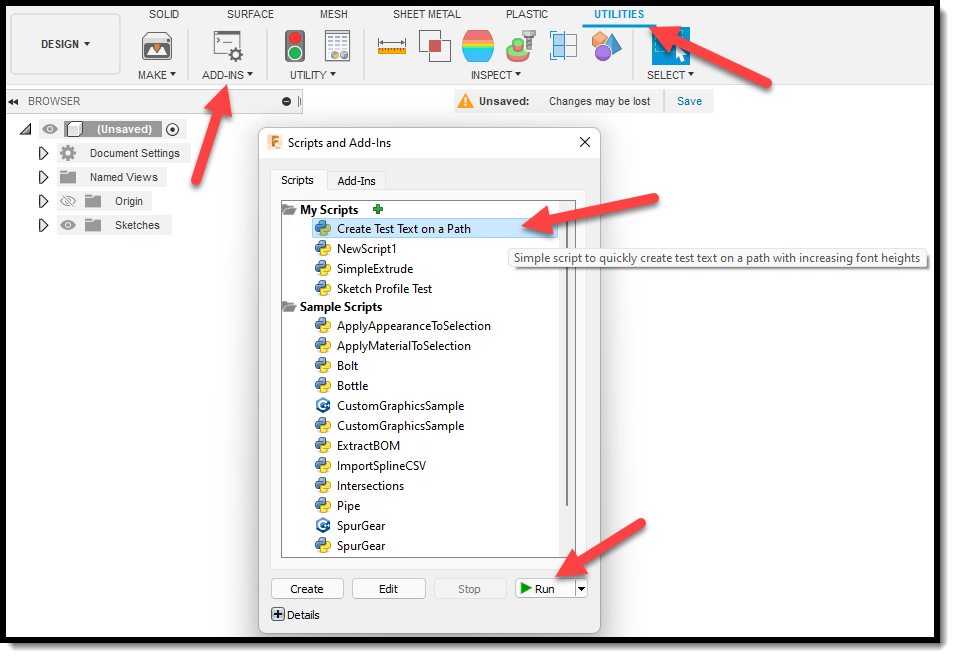
Once the script is created and saved, open the Scripts and Add-Ins dialog (Utilities > Add-Ins > Scripts and Add-Ins or use the shortcut Shift+S) and run the Create Test Text on a Path script in the My Scripts section.
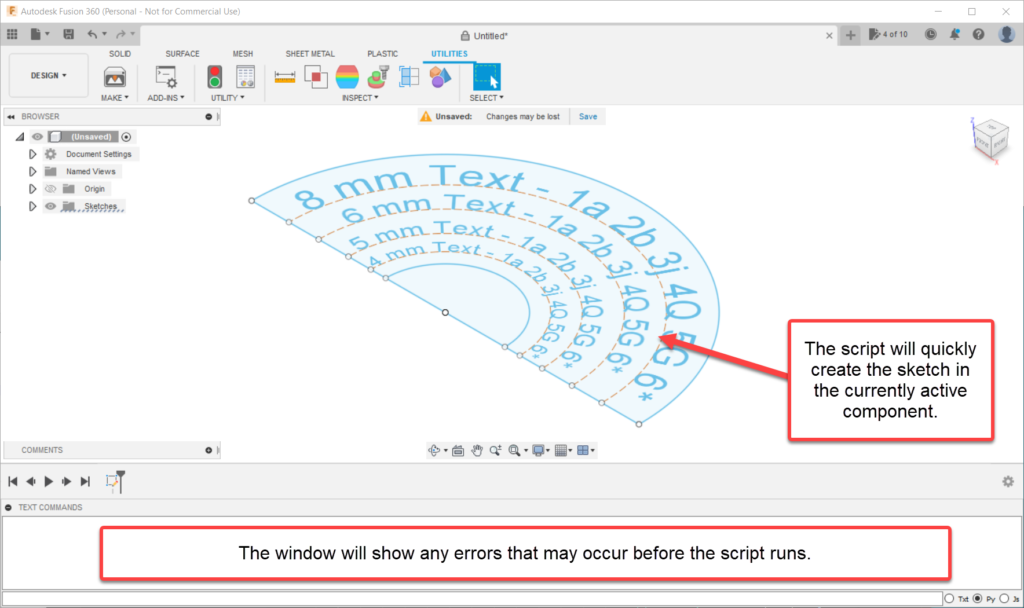
Barring any errors, a new sketch with the text on a path will be created in the active component (or root level if you don’t have any components created).
The script has a few easy-to-edit variables near the top of the script (highlighted in the code block above). Try changing one or more and see the results. I took a “brute force” approach on purpose to make it easy for anyone to decipher the code. It makes editing easier (but quite repetitive!)
You are now on your own to continue editing. Go ahead and extrude the profiles and then engrave or emboss your text to finish creating your model for 3D printing.
One thing that can be improved is adding variables for the font height and prefix strings for each size. I’ll leave that as a challenge for you to explore.
Script Errors
If you tweak the code and then run into error messages, they will show up in a couple of places. The first is in the Text Command window on the bottom the the Fusion 360 window. If the window is collapsed, click the small + symbol to expand it. Errors in here are thrown before the script tries to run. These are usually caused by white space or other formatting errors in the code. The message looks cryptic, but you should be able to get a clue to what’s wrong and which line number is causing the problem.

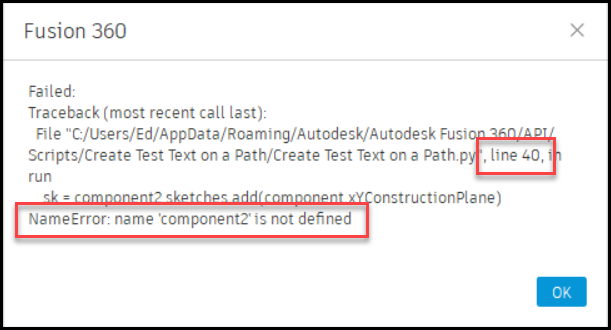
The other error message you might see is a runtime error that is thrown during the execution of the script. These are displayed in the form of a modal dialog box in Fusion’s main window. If you use the generic error handling found in many Fusion 360 sample scripts as I have here, the message looks almost as cryptic as a Windows blue screen of death. Again, if you take a breath and scan the message, you will usually find some helpful information so you can fix your error(s).
Companion YouTube Video
That’s A Wrap!
I hope you found this useful and that it was enough to take some of the mystery out of creating and running your own scripts. The Autodesk Fusion 360 Knowledgebase and Support Forum are great resources to help you out when you are ready to roll up your sleeves and tackle Fusion 360 scripting.
Feel free to leave any comments or questions before you leave. I’d love to know what you think.
“The more we learn, the more we discover how much we do not know.”
– Yoda, Star Wars: Episode III Revenge of the Sith (novelization)